Arrival To Immigration Basics
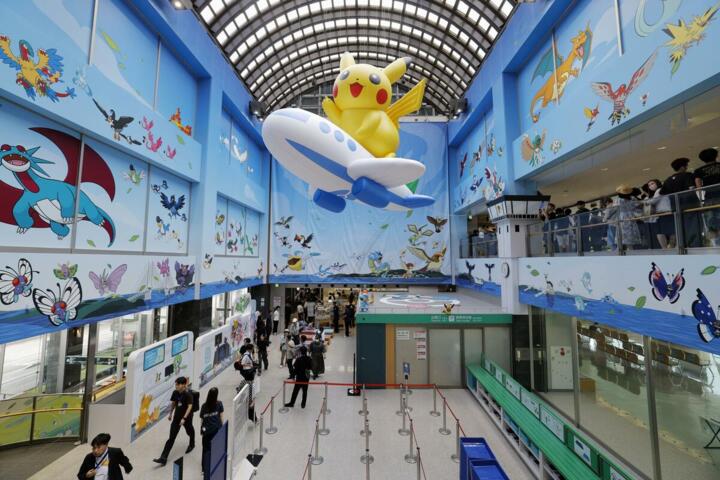
Japan’s entry process starts after you land and move through the airport’s arrival hall. Immigration and customs are separate checks, and the order matters: you clear immigration first, then you collect baggage, then customs may inspect what you bring in.
In most airports, you will follow signs for “Immigration” and “Customs.” Your passport is the core document for immigration, and you may also need a landing card or an electronic submission depending on your travel status and the airport’s current procedures. If you travel with dependents, keep their passports together so you can complete forms without searching mid-line.
Practical example: if you land at Narita or Haneda, you typically pass through immigration counters with staff who scan your passport and verify your entry details. After that, you move to baggage claim, then to customs where you may face a green lane or a red lane based on what you declare.
Airports sometimes change signage and lane layouts, so follow the posted instructions at your specific terminal. On my last review of public guidance, the wording on arrival screens matched the airport’s posted “Customs Declaration” instructions, not the wording on older blogs.
Common Pain Points And Delays
People usually get stuck for predictable reasons: mismatched information, missing documents, or confusion about what must be declared. The immigration officer’s job is to confirm identity and entry eligibility, while customs focuses on goods brought into Japan, including restrictions on food, plants, and certain consumer items.
A frequent mistake is preparing for immigration but not for customs. Travelers may remember to bring their passport and forget that customs questions can involve items in checked luggage, not just carry-on bags. Another delay source is incomplete or inconsistent answers on any required declaration forms, especially when names or dates do not match the passport.
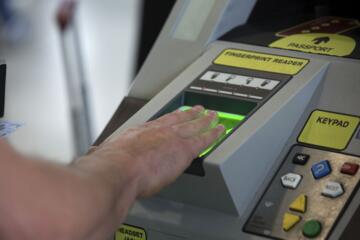
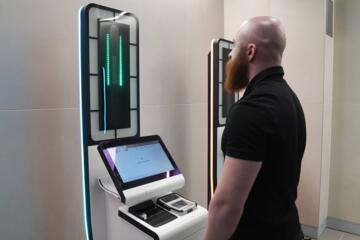
Supporting technologies drive much of the workflow. Passport scanners read machine-readable zones, and customs systems use risk screening to decide which passengers receive closer inspection. That means you can follow every step correctly and still get selected for a secondary check, which is why having documents and receipts accessible helps.
Also, some airports use separate queues for different passenger categories. If you join the wrong line, you may lose time even when your documents are correct, and the staff may redirect you at the counter.
Solutions And Advice For First Timers
Prepare Documents Before Landing
Before you leave your departure city, confirm your passport validity and keep it easy to reach. If your itinerary includes multiple travelers, pack passports in one small folder so you can copy details without opening multiple bags. For any required arrival or declaration paperwork, fill it while you still have stable lighting and a quiet seat, not while standing in a moving queue.
Realistic outcome: travelers who complete forms before the counter often reduce the “time spent searching” problem, which is the part that creates bottlenecks. In practice, the counter interaction itself may take only a few minutes, but the delay comes from missing pages, unclear handwriting, or inconsistent spellings.
Side observation: on a recent checklist review for travelers, version numbers on official airport guidance pages changed between 2023 and 2024, and the layout of instructions differed even when the underlying rules stayed the same.
Understand Customs Lanes And Declarations
Customs decisions typically depend on whether you bring items that must be declared or restricted. Many airports use a green lane for passengers with nothing to declare and a red lane for those who need to declare goods. If you are unsure, choose the lane that matches “declaration required” rather than guessing, because staff can ask follow-up questions and inspect bags.
Common declared categories include certain food products, plants and seeds, and items subject to quantity limits. If you bring gifts, alcohol, tobacco, or medications, keep them organized so you can answer questions quickly. Keep packaging labels when possible; they help staff verify product type and quantity.
Realistic outcome: if you declare correctly, you usually avoid delays caused by secondary checks triggered by undeclared items. If you guess wrong, the inspection can take longer because staff must verify what you actually have.
Handle Baggage And Secondary Checks
After immigration, you collect baggage at the carousel. If your luggage is delayed or you suspect damage, report it at the airport’s baggage service desk before you leave the arrivals area. For customs, keep your bag accessible and avoid locking it in a way that slows inspection.
If you are selected for secondary screening, remain calm and follow instructions. Staff may open bags, scan items, or ask about specific goods. Having a simple inventory in your head helps: where the food is, where the medications are, and which items are gifts.
Side observation: I’ve seen travelers waste time by moving items around to “hide” something, which rarely helps. A better approach is to present items clearly and answer questions directly.
Use Official Channels For Rule Changes
Japan’s entry and customs rules can change with public health measures, seasonal restrictions, or policy updates. Use official sources such as Japan’s Ministry of Foreign Affairs guidance for entry requirements and the Japan Customs website for prohibited or restricted goods. If you travel with prescriptions, check whether your medication is subject to special rules and carry the prescription or a doctor’s letter.
Realistic outcome: checking official guidance within a few days of travel reduces the chance you arrive with outdated assumptions. It also helps you decide whether to pack items in checked luggage or leave them behind.
Tool detail: many travelers use the “Japan Customs” pages and the “MOFA” entry guidance pages as reference tabs on a phone. A quick search for the exact airport name plus “customs declaration” can also help you match the posted lane instructions.
Case Examples: What Happens At The Counter
Scenario 1: Food Gifts In Checked Luggage
A traveler arrives with small food gifts packed in checked luggage. At customs, the passenger is unsure whether the items require declaration. The traveler chooses the declaration lane, presents the packaged goods, and answers questions about type and quantity. The staff may inspect the items, then allow entry after confirming they fall within permitted categories.
Lesson: uncertainty is common, and choosing the declaration lane reduces the risk of a later problem. Keeping labels and packaging makes the inspection faster because staff can identify products without guesswork.
Scenario 2: Medication Without Documentation
A traveler carries prescription medication in a carry-on bag but does not bring the prescription paperwork. During customs questioning, the staff ask for details about the medication. Without documentation, the traveler may face delays while staff verify whether the medication is permitted and whether additional steps are needed.
Lesson: medication rules can involve restrictions, and documentation reduces friction. Carrying the prescription label and a doctor’s note helps staff confirm what the medication is and why it is needed.
Customs Workflow Checklist
| Stage | What You Do | What To Have Ready | Common Failure Point |
|---|---|---|---|
| Immigration | Follow signs, approach the counter, and answer identity questions | Passport, any required arrival paperwork, booking details if asked | Name or date mismatches, missing pages, unclear handwriting |
| Baggage Claim | Collect bags and check tags against your itinerary | Baggage claim ticket or phone confirmation, ID if needed | Not reporting issues immediately, mixing up bags |
| Customs | Choose the correct lane and declare restricted items | Food/plant items labels, medication packaging, receipts if available | Guessing about declarations, hiding items, missing labels |
| Exit | Follow staff instructions after inspection | Any paperwork returned by staff, contact info for follow-up | Leaving without required follow-up steps |
If you want a quick step-by-step checklist, use this order: confirm passport readiness, complete any required forms before the counter, collect baggage carefully, sort items that might trigger customs questions, then choose the declaration lane when uncertain.
Common Mistakes That Waste Time
Travelers often treat immigration and customs as one process. They focus on the passport check and then reach customs without organizing items that might require declaration. That approach increases the chance of delays because staff need to ask follow-up questions or inspect bags longer.
Another mistake is relying on outdated advice from forums. Customs rules for food, plants, and certain consumer goods can change, and airports may adjust lane layouts. Checking official guidance close to your departure date reduces the risk of arriving with incorrect assumptions.
People also underestimate how much clarity matters. Illegible handwriting on any required form, inconsistent spelling of names, or unclear quantities can trigger extra questions. A simple habit—double-checking spelling against the passport—prevents many avoidable problems.
Finally, some travelers pack restricted items in a way that makes them hard to find. If you keep medications and any food gifts in accessible compartments, you reduce the time spent searching during inspection, which is the part that tends to feel stressful.
FAQ
Do I need a landing card?
Requirements depend on your travel status and the airport’s current process. Check the latest guidance from Japan’s official entry information and follow the instructions posted at your arrival terminal.
What triggers a customs declaration?
Customs questions focus on items that must be declared or are restricted, such as certain foods, plants, and some medications or goods with quantity limits. If you are uncertain, use the declaration lane.
How long does immigration usually take?
Timing varies by airport, time of day, and passenger volume. Plan for a few minutes per traveler at the counter plus queue time, and keep documents ready to avoid delays from searching.
Can I bring prescription medication into Japan?
Prescription medication is often permitted, but rules can vary by substance. Carry the medication in original packaging and bring prescription documentation or a doctor’s letter when possible.
What should I do if my baggage is missing?
Report it at the airport’s baggage service desk before leaving the arrivals area. Keep your flight details and any baggage tags available so staff can trace the luggage.
Author's Insight
Immigration and customs are separate checks with different goals: identity and entry eligibility first, then goods inspection based on declarations and restrictions. Many delays come from avoidable mismatches between paperwork and what you actually carry, not from the inspection itself. A practical approach is to treat the airport like a sequence of verifications: prepare documents, organize potentially restricted items, and choose the declaration lane when uncertain.
Because procedures can change by airport and date, the safest method is to confirm requirements shortly before travel using official Japan Customs and Ministry of Foreign Affairs guidance. If you want a low-friction plan, pack medication and any food gifts so labels are visible and quantities are easy to state.
Key Takeaways
- Clear immigration first, then collect baggage, then pass through customs; the order affects what you should prepare.
- Most problems come from missing paperwork, inconsistent details, or guessing about declarations.
- Keep labels and documentation accessible for food, plants, and medications to reduce inspection time.
- Use official Japan Customs and MOFA guidance close to departure because rules and airport procedures can change.